harmony java框架
本文最后更新于 2021年12月17日 晚上
文件结构
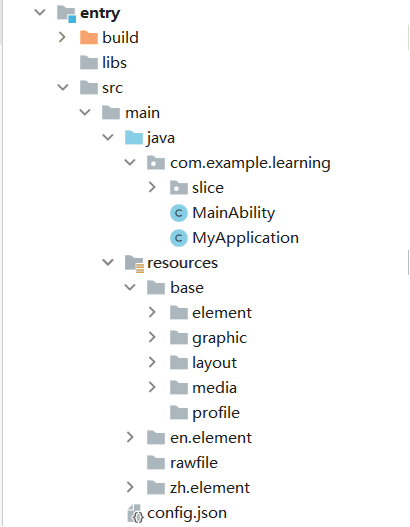
- java: java代码,运行逻辑
- element: 元素资源,存放一些json格式文件,主要是颜色,字符串,bool值等
- graphic: 表示可绘制资源。例如按钮的样式
- layout: 表示布局资源, 控制控件摆放位置和控件的一些属性
- media: 表示媒体资源,如图片、视频等
- build: 存放最终编译后的包
项目配置文件
每个项目下都有一个config文件,它包含了该HAP的一些配置信息。
1 | |
资源使用
resources/base目录下的资源在编译时除了profile目录外都会被编译成二进制文件,并赋予ResourceId,可以使用ResourceTable引用。
resources下另外一大类目录是rawfile目录,这个目录下的文件需要自行创建,并且目录名需要遵循一定的规则,否则无法识别
| 类型 | 含义 |
|---|---|
| 语言 | 表示设备使用的语言类型,由2个小写祖母组成。例如zh,en |
| 文字 | 由一个大写和三个小写组成,例如Hans,Hant(繁体中文) |
| 国家或地区 | 如CN,GB(英国) |
| 横竖屏 | vertical、horizontal |
| 设备类型 | car、tv(电视)、wearable |
| 屏幕密度 | sdpi: dpi[0, 120] mdpi: dpi[120, 160] ldpi: dpi[160, 240] xldip: dpi[240, 320] xxldpi: dpi[320, 480] xxxldpi: [480, 640] |
使用要求:
- 组合顺序为: 语言文字国家或地区-横竖屏-设备类型-屏幕密度
- 取值范围: 每类限定词取指必须符合条件,否则将无法匹配目录中的资源文件
rawfile目录可以创建多个子目录,并且可以自由创建资源文件,系统会自动根据名字匹配当前使用哪种资源文件。目录中的资源文件会直接打包进入应用,不经过编译,不可以用ResourceTable引用
引用资源的方法
普通资源: ResourceTable.type_name
系统资源: ohos:global.systemres.ReousrceTable.type_name
1 | |
xml文件引用:
资源文件: $type:name
系统文件: $ohos:type:name
1 | |
rawfile文件引用:制定文件路径和文件名引用
1 | |
布局
通过xml创建布局
布局在layout下创建,格式为
1 | |
宽和高的布局方式有三种
具体的值: 例如10, 10vp
match_parent: 表示组件将扩展到父组件允许的最大值
match_content: 和控件需要的大笑相适应
加载布局
1 | |
此外,我们还可以读取xml到代码中1
(DirectionalLayout)LayoutScatter.getInstance(this).parse(ResourceTable.Layout_layout_toast, null, false);
通过编码创建布局
首先创建一个方向布局
1 | |
常见布局方式

DirectionLayout
DirectionLayout有两种方向: horizontal和vertical,代表横向和纵向布局。如果垂直或横向长度总和超过父元素将会被截取。
1 | |
DependentLayout
在依赖布局中每个组件可以指定相对于其他同级组件或父组件的位置
相对于同级组件的位置有
| 位置布局 | 描述 |
|---|---|
| above | 同级组件上侧 |
| below | |
| start_of | 位于同级组件起始侧 |
| end_of | 同级组件结束侧 |
| left_of | 同级组件左侧 |
| right_of | 同级组件右侧 |
相对于父组件有
| 布局 | 描述 |
|---|---|
| align_parent_left | 父组件左侧(还是在父组件内) |
| align_parent_right | |
| align_parent_start | |
| align_aprent_end | |
| align_parent_end | |
| align_parent_top | |
| align_parent_bottom | |
| center_in_parent |
1 | |

TableLayout
TableLayout也就是表格布局,它设定几行几列然后向这些行列中填充控件。
如果使用xml需要ohos:row_count设置行的数量和ohos:column_count设置列的数量
1 | |
PositionLayout
位置布局也就是绝对布局,但是这种布局难以维护,一般不使用
StackLayout
1 | |
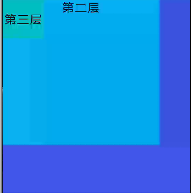
如图所示,第一个添加的位于最底层,最后一个添加的位于最上层。并且上一层视图会覆盖下一层。
如果想切换视图,可以使用
1 | |
AdaptiveBoxLayout
自适应布局类似于swing中的GridBagLayout,相当于把整个layout划分成若干个块,每个块有若干个控件,只有在前一行填满之后才会开始下一行。它可以很方便的切换竖直方向和垂直方向
- 每个块的宽度取决于布局的宽度和每行控件数量
- 每一行的高度有最高控件的高度决定
- 布局的宽度只能是MATCH_PARENT或固定值
组件
Text
显示字符串的组件,他支持根据文本长度自动调整字体大小和换行,他也可以通过background_element设置背景。常用的背景又文本背景、按钮背景、可以使用xml格式放置在graphic目录下
graphic写法如
1 | |
自动换行和自动调整字体大小效果
1 | |
跑马灯效果
1 | |
Button
button是一种特殊的Text,点击后会触发事件。并且他有多种样式,如普通按钮,椭圆按钮,圆形按钮等。这些样式可以通过background_element属性中设置。
如果想要设置按钮为图片,可以将svg转为xml文件,然后再通过ohos:element_left 、ohos:element_right 、 element_top 、 element_buttom来部署图片居于文字的位置
1 | |
TextField
textField是文本输入框,他可以通过text_input_type来设置不同类型的输入值
- text_input_type = “pattern_password”: 密码类型
- “pattern_text”: 文本类型
- “pattern_number”: 数字类型
- “pattern_null”: 空类型
一些设置:
- hint: 提示文字
- element_cursor_bubble: 光标气泡,如
ohos:element_cursor_bubble = "$graphic:ele_cursor_bubble"/> - multiple_lines: 多行显示,true或false
Image
Image一般放在resource的media目录下,可以使用图片Image显示本地图片
xml显示
1 | |
代码显示
1 | |
| 缩放方式 | 值 |
|---|---|
| 按比例将原图变换到Image的宽度,居中显示 | zoom_center |
| …,显示在上部 | zoom_start |
| …,显示在Image的下部 | zoom_end |
| 不按比例将图片变换到Image大小并显示 | stretch |
| 保持原图大小,显示在Image的中心 | center |
| 按比例将原图缩小到Image的宽度,将图片的内容完整居中显示 | inside |
| 按比例将原图缩放到Image中宽度和高度较大的值, 如当设置的高度值较大时,在垂直方向上完整显示 |
clip_center |
如果想要加载网络图片,步骤如下:
在config.json中添加
1
2
3
4
5
6
7
8
9{
"module": {
"reqPermission": [
{
"name": "ohos:permission.INTERNET"
}
]
}
}配置网络访问白名单
1
2
3
4
5
6
7
8
9
10
11
12
13
14
15
16"deviceConfig":{
"default":{
"network":{
"usesCleartext": true,//是否允许明文传输
"securityConfig": {
"cleartextPermitted": true,
"domains":{
[
"subDomains": true,
"name": "blog.51itoto.com"
]
}
}
}
}
}然后使用加载图片的方法
1
2
3
4
5
6
7
8
9
10
11
12
13
14
15
16
17
18
19
20
21
22
23
24
25
26
27
28
29
30
31
32
33
34
35
36
37
38
39
40
41
42
43
44public void loadNetImageURL()
{
String URLImage = "";
HttpURLConnection connection = null;
try
{
URL URL = new URL(URLImage);
URLConnection URLConnection = URL.openConnection();
if(URLConnection instanceof HttpURLConnection)
{
connection = (HttpURLConnection)URLConnection;
}
if(connection != null)
{
connection.connect();
InputStream inputStream = URLConnection.getInputStream();
ImageSource imageSource = ImageSource.create(inputStream, new ImageSource.SourceOptions());
ImageSource.DecodingOptions decodingOptions = new ImageSource.DecodingOptions();
decodingOptions.desiredPixelFormat = PixelFormat.ARGB_8888;
PixelMap pixelMap = imageSource.createPixelmap(decodingOptions);
getUITaskDispatcher().syncDispatch(()->{
new ToastDialog(MainAbilitySlice.this)
.setText("333")
.show();
img.setPixelMap(pixelMap);
img.release();
});
}
}
catch(Exception e)
{
System.out.println(e.fillInStackTrace());
}
}
//在onStart中开启新线程方便加载
img = (Image)findComponentById(ResourceTable.Id_photo);
new Thread(new Runnable(){
@Override
public void run()
{
loadNetImageURL();
}
}).start();TabList
TabList是标签页,他和一些图形框架中不同的是它只有标签页,没有内容区域,内容区域的切换需要我们自己管理
1 | |
效果为
Picker
Picker是滑动选择器,允许用户在预定义范围内选择
设置取值范围1
2picker.setMinValue(0);
picker.setMaxValue(6);
设置显示字符串(默认会显示取值的数字)1
2
3
4
5
6
7picker.setFormat(i->{
String value;//要显示的字符串
switch(i)//第几个序号
{
case ...: value = "...";break;
}
return value;
要响应选择器的变化可以使用1
2picker.setValueChangedListener((picker1, oldVal, newVal)->{
});
1 | |
结果为
DatePicker
DatePicker是日期选择器,他会默认选择当前日期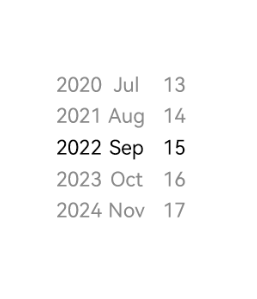
CheckBox
checkBox是复选框,和spring框架中类似
响应是否选中的事件为1
2checkbox.setCheckedStateChangedListener((component, state)->{//选中或没选中
});
RaidoButton
单选按钮,如果和RaidoContainer使用,可以实现在多个按钮中只能选择一个
ToastDialog
ToastDialog是窗口上方弹出的对话框,可以反馈消息,他会在一段时间后消失,在此期间,还可以操作其他组件。
1 | |
 如图,点击是一个按钮,显示是点击按钮后出现的提示文字
CommonDialog
上面的提示框就是以CommonDialog为基类的,它可以根据需求自定义提示框
- commonDialog.setContentCustomComponent(rootComponent): 重新设置根控件
- commonDialog.setTransparent(true); 设置背景透明
- commonDialog.setAlignment(LayoutAlignment.CENTER)
- commonDialog.setCornerRadius(15): 设置圆角
- commonDialog.show(): 显示对话框
ProgressBar
ProgressBar是进度条,他有如下函数
- setProgressValue(value): 设置当前进度值
- setMaxValue(maxValue)
- setMinValue(minValue)
- enableDividerLines(true): 设置分割条
- setDividerLinesNumber(5): 将进度条划分成6等份,每隔一段有一个垂直的分隔线
Slider
滑块
ScrollView
ScrollView是滚动组件,它继承自StackLayout,也可以将它作为一种布局使用
一般来讲,先在ScrollLayout下放置一个DirectionLayout,然后再再这个layout下放置组件
函数:
- scrollView.fluentScrollByY(amount): 平滑滚动若干距离
- scrollView.fluentScrollYTo(loc): 平滑滚动到某个位置
- scrollView.setReboundEffect(true): 设置回弹效果
- scrollView.setMatchViewportEnabled(true): 设置匹配缩放效果
ListContainer
ListContainer也就是列表组件,他可以自定义列表数据的类型和样式
自定义数据1
2
3
4
5
6
7
8
9
10
11
12
13
14
15
16
17public class SampleItem
{
private String name;
public SampleItem(String name)
{
this.name = name;
}
public String getName()
{
return name;
}
public void setName(String name)
{
this.name = name;
}
}
然后创建一个类继承BaseItemProvider,并且里面包含的数据时SampleItem1
2
3
4
5
6
7
8
9
10
11
12
13
14
15
16
17
18
19
20
21
22
23
24
25
26
27
28
29
30
31
32
33
34
35
36
37
38
39
40
41
42
43
44
45
46
47
48
49
50public class SampleItemProvider extends BaseItemProvider
{
private List<SampleItem> list;
private AbilitySlice slice;
public SampleItemProvider(List<SampleItem> list, AbilitySlice slice)
{
this.list = list;
this.slice = slice;
}
@Override
public int getCount()
{
return list == null ? 0 : list.size();
}
@Override
public Object getItem(int position)
{
if(list != null && position > 0 && position < list.size())
{
return list.get(position);
}
return null;
}
@Override
public long getItemId(int position)
{
return position;
}
@Override
public Component getComponent(int position, Component convertComponent, ComponentContainer componentContainer)
{
final Component cpt;
if(convertComponent == null)
{
cpt = LayoutScatter.getInstance(slice).parse(ResourceTable.Layout_item_sample, null, false);
}
else
{
cpt = convertComponent;
}
SampleItem sampleItem = list.get(position);
Text text = (Text) cpt.findComponentById(ResourceTable.Id_item_index);
text.setText(sampleItem.getName());
return cpt;
}
}
然后向ListContainer添加数据1
2
3
4
5
6
7
8
9
10
11
12
13
14
15
16
17
18
19
20@Override
public void onStart(Intent intent)
{
super.onStart(intent);
super.setUIContent(ResourceTable.Layout_page_listcontainer);
ListContainer listContainer = (ListContainer)findComponentById(ReosurceTable.Id_list_container);
List<SampleItem> list = getData();
SampleItemProvider sampleItemProvider = new SampleItemProvider(list, this);
listContainer.setItemProvider(sampleItemProvider);
}
private ArrayList<SampleItem> getData()
{
ArrayList<SampleItem> list = new ArrayList<>();
for(int i=0; i<=8; i++)
{
list.add(new SampleItem("Item" + i));
}
return list;
}
他可以响应单击事件和长按事件:
- setItemClickedListener
- setItemLongClickedListener
PageSlider
它也提供页面的切换效果,提供上下及左右滑动的功能
监听器:
- addPageChangedListener: 可以监视滑动和滑动到页面切换时的事件
想要实现切换效果,可以进行如下步骤:
- 添加PageSlider和RadioContainer,设置PageSlider的高度为0vp,权重weight=1,这样pageSlider就会占据除RadioContainer外的全部空间
- 创建不同页面的布局文件
- 添加页面切换时的数据源
- 监听页面切换事件
1 | |
主程序1
2
3
4
5
6
7
8
9
10
11
12
13
14
15
16
17
18
19
20
21
22
23
24
25
26
27
28
29
30
31
32
33
34
35
36
37
38
39
40
41
42
43
44
45
46
47
48
49
50
51
52
53
54
55
56
57
58
59
60@Override
public void onStart(Intent intent) {
super.onStart(intent);
super.setUIContent(ResourceTable.Layout_page_slider);
pageSlider = (PageSlider)findComponentById(ResourceTable.Id_page_slider);
radioContainer = (RadioContainer)findComponentById(ResourceTable.Id_page_slider_radio);
((RadioButton)radioContainer.getComponentAt(0)).setChecked(true);
LayoutScatter scatter = LayoutScatter.getInstance(getContext());
DirectionalLayout page0 = (DirectionalLayout)scatter.parse(ResourceTable.Layout_slider_page0, null, false);
DirectionalLayout page1 = (DirectionalLayout)scatter.parse(ResourceTable.Layout_slider_page1, null, false);
DirectionalLayout page2 = (DirectionalLayout)scatter.parse(ResourceTable.Layout_slider_page2, null, false);
List<Component> pageArr = new ArrayList<>();
pageArr.add(page0);
pageArr.add(page1);
pageArr.add(page2);
pageSlider.setProvider(new PageSliderProvider() {
@Override
public int getCount() {
return pageArr.size();
}
@Override
public Object createPageInContainer(ComponentContainer componentContainer, int i) {
componentContainer.addComponent(pageArr.get(i));
return pageArr.get(i);
}
@Override
public void destroyPageFromContainer(ComponentContainer componentContainer, int i, Object o) {
((PageSlider)componentContainer).removeComponent(pageArr.get(i));
}
@Override
public boolean isPageMatchToObject(Component component, Object o) {
return component == o;
}
});
pageSlider.addPageChangedListener(new PageSlider.PageChangedListener() {
@Override
public void onPageSliding(int i, float v, int i1) {
}
@Override
public void onPageSlideStateChanged(int i) {
}
@Override
public void onPageChosen(int i) {
((RadioButton)radioContainer.getComponentAt(i)).setChecked(true);
}
});
radioContainer.setMarkChangedListener((radioContainer, i) -> new ToastDialog(MainAbilitySlice.this)
.setText(i + "")
.show());
}
}
剪切板
剪切板可以实现两个程序之间的数据共享,使用时需要注意:
- 只有在前台获得焦点的应用才有权限读取剪切板,系统默认输入法除外
- 写入剪切板的数据不会随应用结束而销毁
- 写入剪切板数据会被覆盖
- 同一设备内,剪切板单次内容不应超过800kb
接口:
| 接口 | 描述 |
|---|---|
| getSystemPastedboard(Context context) | 获得剪切板实例 |
| getPasteData() | 获得剪切板的数据 |
| hasPasteData() | 剪切板是否有数据 |
| setPasteData(PasteData data) | |
| clear() | |
| addPasteDataChangedListener(IPasteDataChangedListener listener) | |
| removePasteDataChangedListener(IPasteDataChangedListenre listener |
线程
线程派发
不同的线程有不同的优先级,一般让UI线程有最高的优先级,如果一个任务无需等待结果,则可以使用低优先级。共有三种优先级HIGH、DEFAULT、LOW
- GlobalTaskDispatcher: 全局并发分发器,他会在程序结束后才销毁,一个应用应该只有一个全局分发器。获得方式为
TaskDispatcher dispatcher = getGlobalTaskDispatcher(TaskProiority.DEFAULT); - ParallelTaskDispatcher: 他可以随自己需要创建和销毁
1
2String dispatcherName = "parallelTaskDispatcher";
TaskDispatcher dispatcher = createParallelTaskDispatcher(dispatcherName, TaskPriority.DEFAULT); - SerailTaskDispatcher: 串行分发器。所有任务都是按照顺序执行的,但是执行这些任务的线程不一定固定。如果想要并行,则使用 前面两种
1
2String dispatcherName = "abc";
TaskDispatcher dispatcher = createSerialTaskDispatcher(dispatcherName, TaskPriority.DEFAULT); - SpecTaskDispatcher: 专有任务分发器,绑定到专有线程上进行处理。目前专有线程是主线程,UITaskDispatcher和MainTaskDispatcher都是S赔偿TaskDispatcher,并且建议使用UITaskDispatcher.
TaskDispatcher dispatcher = getUITaskDispatcher()
任务派发
syncDispatch: 同步派发任务,派发任务并在当前线程等待任务完成,返回前线程将被阻塞
1
2
3
4
5
6
7
8
9
10
11
12
13
14
15
16
17
18
19
20
21
22TaskDispatcher dispatcher = getGlobalTaskDispatcher(TaskPriority.DEFUALT);
globalTaskDispatcher.syncDispatch(new Runnable(){
@Override
public void run()
{
HiLog.info(label, "sync task1 run");
}
});
HiLog.info(label, "after sync task1");
globalTaskDispatcher.syncDispatch(new Runnable(){
@Override
public void run()
{
HiLog.info(label, "sync task2 run");
}
});
HiLog.info(label, "after sync task2");
执行结果为
sync task1 run
after sync task1
sync task2 run
sync task2 runsyncDispatch使用不当可能会导致死锁,例如下列情况会导致死锁
- 在专有线程上使用该专有线程分发器进行syncDispatch
- 在串行任务分发器中再次利用同一个分发器分发任务
- a串行分发器在任务中会用b分发器,b在任务中又使用a
- asyncDispatch: 异步分发器。派发任务并立刻返回,返回值是一个可用于取消任务的接口
1
2
3
4
5
6
7
8
9
10
11
12TaskDispatcher globalTaskDispatcher = getGlobalTaskDispatcher(TaskPriority.DEFAULT);
Revocable revocable = globalTaskDispatcher.asyncDispatch(new Runnable(){
@Override
public void run()
{
HiLog.info(label, "async task1 run");
}
});
HiLog.info(label, "after async task1");
结果为:
after async task1
async task1 run - delayDispatch: 也是异步执行,但是会在指定时间后才派发到相应任务处理队列中,再等待一段时间后才会执行
1
2
3
4
5
6
7
8
9Revocable revocable = globalTaskDispatcher.delayDispatch(new Runnable(){
@Override
public void run()
{
HiLog.info(label, "delayDispatch task1 run");
final long actualDelayMs = System.currentTimeMillis() - callTime;
HiLog.info(label, actualDelayMs);
}
}, delayTime); Group: 任务组表示一组任务,由
createDispatchGroup创建,他可以同时控制多个任务1
2
3
4String name = "dispatcher";
TaskDispatcher dispatcher = createParallelTaskDispatcher(name, TaskPriority.DEFAULT);
Group group = dispatcher.createDispatcherGroup();
dispatcher.asyncGroupDispatch(group, new Runnable(){...});此外还可以设置屏障,只有任务组中所有任务都执行完成之后才会执行屏障任务,GlobalTaskDispatcher设置屏障无效.
屏障也有同步屏障
syncGroupBarrier和异步屏障asyncDispatcherBarrier1
2
3
4
5
6
7
8
9
10
11
12
13
14
15
16
17
18
19
20
21
22Group group = dispatcher.createDispatchGroup();
dispatcher.asyncGroupDispatch(group, new Runnable(){
@Override
public void run()
{
HiLog.info(label, "task1 is running");
}
});
dispatcher.asyncGroupDispatch(group, new Runnable(){
@Override
public void run()
{
HiLog.info(label, "task2 is running");
}
});
dispatcher.syncDispatchBarier(new Runnable(){//只有前两任务结束才会执行这个
@Override
public void run()
{
HiLog.info(label, "barrier");
}
});- Revocable: 取消任务可以使用
revocable.revoke(); applyDispatch: 执行多次任务
1
2
3
4
5
6
7
8
9
10
11
12
13
14
15
16
17final int total = 10;
//在total减到0才会放开,否则阻塞当前线程
final CountDownLatch latch = new CountDownLatch(total);
final ArrayList<Long> indexList = new ArrayList<>(total);
TaskDispatcher dispatcher = getGlobalTaskDispatcher(taskPriority.DEFAULT);
dispatcher.applyDispatch((index)->{
indexList.add(index);
latch.countDown();
}, total);
try
{
latch.await();//total没减到0阻塞
}
catch(InterruptedException e)
{
HiLog.error(label, "latch exception");
}线程间通信
EventRunner是事件的执行者,每次遇到投递过来的事件时会在新线程进行处理。而EventHandler是事件的派发者,他负责派发事件。一个EventHandler对应一个EventRunner,一个EventRunner可以有多个EventHandler。
EventRunner分为手动和托管两种模式: 托管模式不需要我们调用run()和stop()。他会在线程创建时自动调用run(),并且在没有引用时自动调用stop()
例如:
1 | |
网络和设备
网络
访问网络大致流程为:
- 调用NetManager.getInstance(Context)获得网络管理的实例对象
- 调用NetManager.getDefaultNet()获得默认数据网络
- 调用NetHandle.openConnection()打开URL
- 通过URL链接实例访问网站
1 | |
位置
| 接口 | 说明 |
|---|---|
| Locator(Context context) | 创建Locator |
| RequestParam(int scenario) | 根据定位场景类型创建定位请求的RequestParam |
| onLocationReport(Location location) | 获取定位结果 |
| startLocating(RequestParam request, LocatorCallback callback) | 向系统发起定位请求 |
| requestOnce(RequestParam request, LocatorCallback callback) | 单次请求 |
| stopLocating(LocatorCallback callback) | 结束定位 |
| getCachedLocation() | 获取系统缓存的位置信息 |
过程:
- 首先需要获得权限,定位权限有
ohos.permission.LOCATION和ohos.permission.LOCATION_IN_BACKGROUND 开启定位并写回调函数
启动定位函数为
locator.startLocating(requestParam, locatorCallback)然后我们就可以开始获得定位了,如果我们不需要经常获得,则调用
locator.requestOnce(requestParam, locatorCallback).其中requestParam表示定位精度,locatorCallback是回调函数locatorCallback如下
1
2
3
4
5
6
7
8
9
10
11
12
13
14
15
16LocatorCallback locatorCallback = new LocatorCallback() {
@Override
public void onLocationReport(Location location) {
}
@Override
public void onStatusChanged(int i) {
}
@Override
public void onErrorReport(int i) {
}
}requestParam构建如:
1
RequestParam requestParam = new RequestParam(ReuqestParam.PRIORITY_ACCURACY, 0, 0);//上报最短时间间隔和最短距离间隔
| 常量 | 说明 |
|---|---|
| SCENE_NAVIGATION | 导航场景,适用于户外设备实时位置 |
| SCENE_TRAJECTORY_TRACKING | 轨迹跟踪场景,主要是运动记录 |
| SCENE_CAR_HAILING | 打车时定位当前位置 |
| SCENEN_DAILY_LIFE_SERVICE | 生活场景,精度较低,只提供大致位置 |
| SCENE_NO_POWER | 系统在其他应用启动定位时会顺带发给该程序,不产生额外功耗 |
| PRIORITY_ACCURACY | 在室外精确,在室内不精确 |
| PRIORITY_FAST_FIRST_FIX | 快速定位,会使用多种技术定位并挑选最好的结果,功耗大 |
| PRIORITY_LOW_POWER | 低功耗,主要依赖基站和WLAN、蓝牙定位。定位精度波动较大 |
地理编码转化为位置信息
地理编码非常精确但并不直观,可以通过编码转化能力转化为位置信息,或者通过地名转化为经纬度。
- 获得实例:
GeoConvert geoConvert = new GeoConvert(); - 获得转化结果:
getConvert.getAddressFromLocation(纬度, 经度, 1)或者geoConvert.getAddressFromLocationName("北京大兴国际机场", 1)
视频
播放视频过程1
2
3
4
5
6
7
8
9
10
11
12
13
14
15
16
17Player mPlayer = new Player(VideoAbilitySlice, this);
private void playLocalFile(Surface surface)
{
try{
RawFileDescriptor fileDescriptor = getResourceManager().getRawFileEntry("resources/rawfile/test.mp4").openRawFileDescriptor();
//如果是网络视频可以用new Source(url)
Source srouce = new Source(fileDescriptor.getFileDescriptor(), fileDescriptor.getStartPosition(), fileDescriptor.getFileSize());
mPlayer.setSource(source);//设置播放源
mPlayer.setVideoSurface(surface);//设置播放界面
mPlayer.setPlayerCallback(new VideoPlayerCallback());
mPlayer.prepare();
mPlayer.play();
catch(Exception e)
{
System.out.println("playURL Exception:" + e.getMessage());
}
}
相机
概念:
- 物理相机: 物理相机是单个摄像头,用一个物理ID标识
- 逻辑相机: 逻辑相机是多个相机的组合抽象。拥有大光圈、变焦等功能
- 帧捕获: 相机启动后捕获图像。可以只捕获一帧(照相),也可以捕获多帧,也可以一直捕获(录像)。
使用流程:
- 获取权限:相机相关的权限有
- ohos.permission.CAMERA: 相机权限,必选
- ohos.permission.MICROPHONE: 录音权限,在录像时需要
- ohos.permission.WRITE_USR_STORAGE: 存储权限,保存图像是需要
- ohos.permission.LOCATION: 保存图像位置时需要
相机设备创建:
1
2
3
4
5CamreraKit cameraKit = CameraKit.getInstance(context);
if(cameraKit == null)
{
//相机获取失败
}相机有时候会被其他设备占用导致获取失败,可以使用getCameraIds()获得当前设备可用的逻辑相机ID列表。如果列表为空则代表当前没有可用相机
当查询到有可用相机后,可以制定获取某个相机
1
2EventHandler eventHandler = new EventHandler(EventRunner.create("CameraCb");
cameraKit.createCamera(cameraIds[0], cameraStateCallback, eventHandler)获得相机信息的函数
- getFacingType(): 获得相机朝向信息
- getDeviceLinkType(String pyhsicalId): 获得物理相机连接方式
- getLogicalId(): 获得逻辑相机Id
- getPhysicalIdList(): 获得物理相机Id列表
- getSupportedSizes(int format): 根据格式查询输出图像分辨率列表
相机设备配置
相机配置主要是设置预览,拍照、录像所用到的Surface,如果没有配置则这些功能无法使用。此外,为了获得拍照结果数据,需要配置
setFrameStateCallback(FrameStateCallback, EventHandler)设置帧回调1
2
3
4
5
6
7
8
9
10
11
12
13在前面创建相机的回调函数中
cameraConfigBuilder = camera.getCameraConfigBuilder();
cameraConfigBuilder.addSurface(previewSurface);
cameraConfigBuilder.addSurface(imageReceiver.getRecevingSurface());
cameraConfigBuilder.setFrameStateCallback(frameStateCallbackImpl, handler);
try
{
camera.configure(cameraConfigBuilder.build());
}
catch(IllegalArgumentException e)
{
HiLog.error(LABEL, "State Exception");
}相机帧捕获
使用相机的一些操作类开始进行捕获- triggerSingleCapture(FrameConfig frameConfig): 启动单帧捕获
- triggerMultiCapture(List\
- flushCaptures():停止并清除捕获
- triggerLoppingCapture(FrameConfig frameConfig): 启动循环捕获(录像)
声频
使用声频采集之前,需要申请话筒权限ohos.permission.MICROPHONE
例1
2
3
4
5
6
7
8
9
10
11
12
13
14
15
16
17
18
19
20
21
22
23
24
25
26
27
28
29
30
31
32
33
34
35
36
37
38
39
40
41
42
43
44
45
46
47
48
49
50
51
52
53
54
55
56
57
58
59
60
61
62
63
64
65
66
67
68
69
70
71
72
73public class PlaySoundUtil
{
private AudioStreamInfo audioStreamInfo = null;
private AudioRendererInfo audioRendererInfo = null;
private AudioRenderer.PlayMode playMode = AudioRenderer.PlayMode.MODE_STREAM;
private AudioRenderer audioRenderer = null;
private AudioManager audioMnaager = null;
private InputStream soundInputStream = null;
private String fileNmae = null;
public PlaySoundUtil()throws IOException
{
audioStreamInfo = new AudioStreamInfo.Builder().sampleRate(44100)
.audioStreamFlag(AudioStreamInfo.AudioStreamFlag.AUDIO_STREAM_FLAG_MY_DUCK);//混音
.channelMask(AudioStreamInfo.ChannelMask.CHANNEL_OUT_STEREO);//双声道
.streamUsage(AudioStreamInfo.StreamUsage.STREAM_USAGE_MEDIA);//媒体类声频
.build();
audioRendererInfo = new AudioRendererInfo.Builder().audioStreamInfo(audioStreamInfo)
.audioStreamOutputFlag(AudioRendererInfo.AudioStreamOutputFlag.AUDIO_STREAM_OUTPUT_FLAG_DIRECT_PCM);//pcm格式输出流
.bufferSizeInBytes(1024)
.isOffload(false)//表示分段传输buffer并播放,true表示将整个声频一次传输
.build();
audioRenderer = new AudioRenderer(audioRendererInfo.playMode);
}
public void loadSound(String fileName)
{
this.fileName = fileName;
String filePath = String.format("assets/entry/resources/rawfile/music/%s", fileName);
soundInputStream = this.getClass().getClassLoader().getResourceAsStream(filePath);
int bufSize = audioRenderer.getBufferFrameSize();
Byte[] buffer = new Byte[1024];
int len;
try
{
audioRenderer.start();
while(len = soundInputStream.read(buffer, 0, buffer, length)) != -1)
{
audioRenderer.write(buffer, 0, buffer.length);
}
soundInputStream.close();
}
catch(Exception e)
{
e.printStackTrace();
}
}
public AudioRenderer getAudioRenderer()
{
return this.audioRenderer;
}
private TaskDispatcher globalTaskDispatcher = null;
public void asyncLoadSound(String fileName, AbilityContext cxt)
{
globalTaskDispatcher = cxt.getGlobalTaskDispatcher(TaskPriority.DEFAULT);
if(audioRenderer.getState() == AudioRenderer.State.STATE_PLAYING)
{
audioRenderer.pause();
return;
}
Revocable revocable = globalTaskDispatcher.asyncDispatch(new Runnable(){
@Override
public void run()
{
laodSound(fileName);
}
});
}
}